• About Me
  • Contact Me
  • Events
    • E-mail
    • Facebook
    • Instagram
    • Pinterest

The Crafty oINK Pen

Independent Stampin' Up! Demonstrator Mikaela Titheridge

  • Home
  • Blog
  • Shop
    • Shop Online
    • Gift Vouchers
    • Clearance Rack
    • Retired Products
    • Product Shares
  • Classes & Tutorials
    • Tutorials
  • Buy the Starter Kit
    • Buy the Starter Kit for £99
    • FAQ

Artisan Design Team – Sentimental Christmas Ornaments

December 4, 2024 by Mikaela Titheridge Leave a Comment

The Artisan Design Team has been crafting with the new Sentimental Christmas Paper. This wonderful Philanthropic paper helps support worthy charities around the globe and is just beautiful to create with.

I decided to create some vintage looking paper christmas ornaments. Using the entire Sentimental Christmas Wishes suite, I set to work to create three beautiful ornaments.
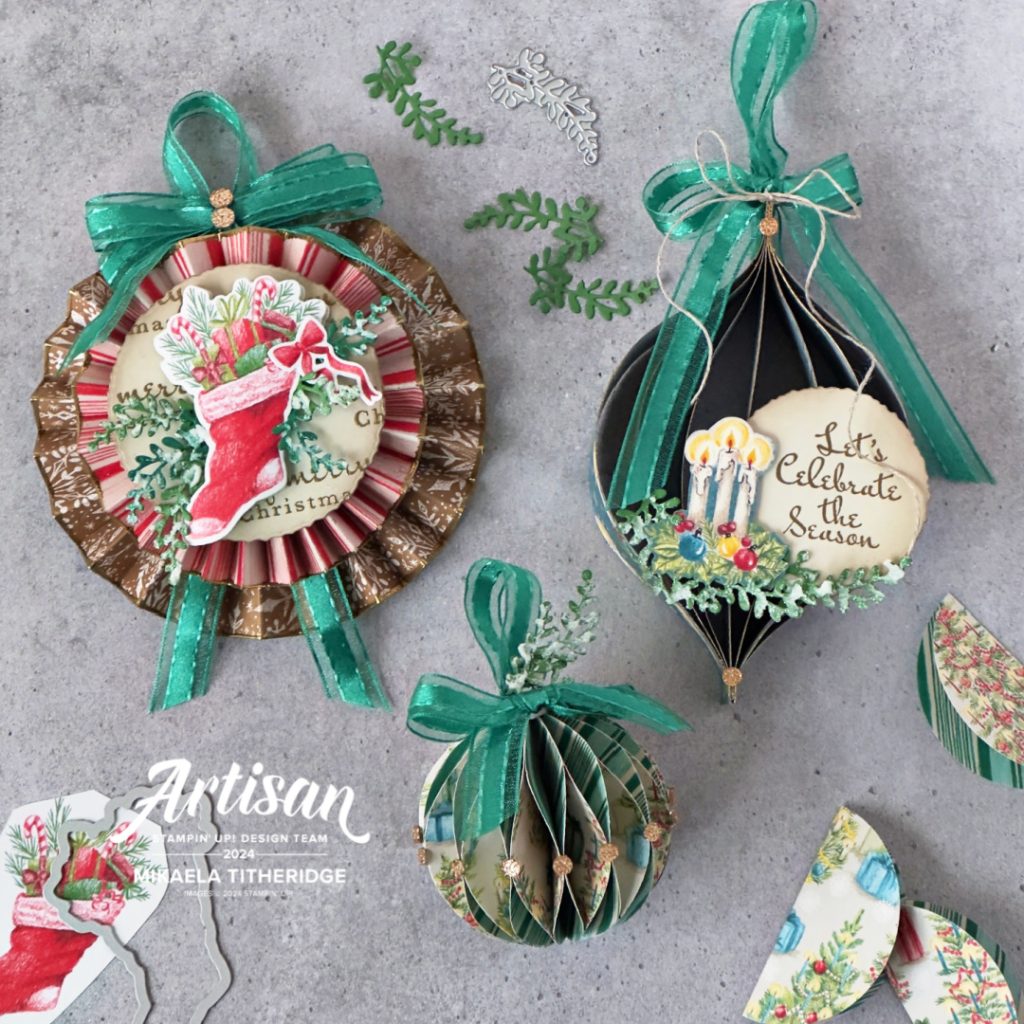
Rossette Christmas Ornaments

I created two rossettes from two different coloured papers to nest upon each other. Strips of Designer Series Paper can easily create Rossettes by repeatedly scoring at equal measurements and concertinering them. A backing circle of card used to adhere the rossette to, helps keep everything in place.

Here I used 2″ strips for my base and 1 1/2″ strips for the top rossette, each scored at 1/2″ intervals.

A long loop of ribbon was sandwiched between the two rossettes, which I adhered together with Hot Glue.
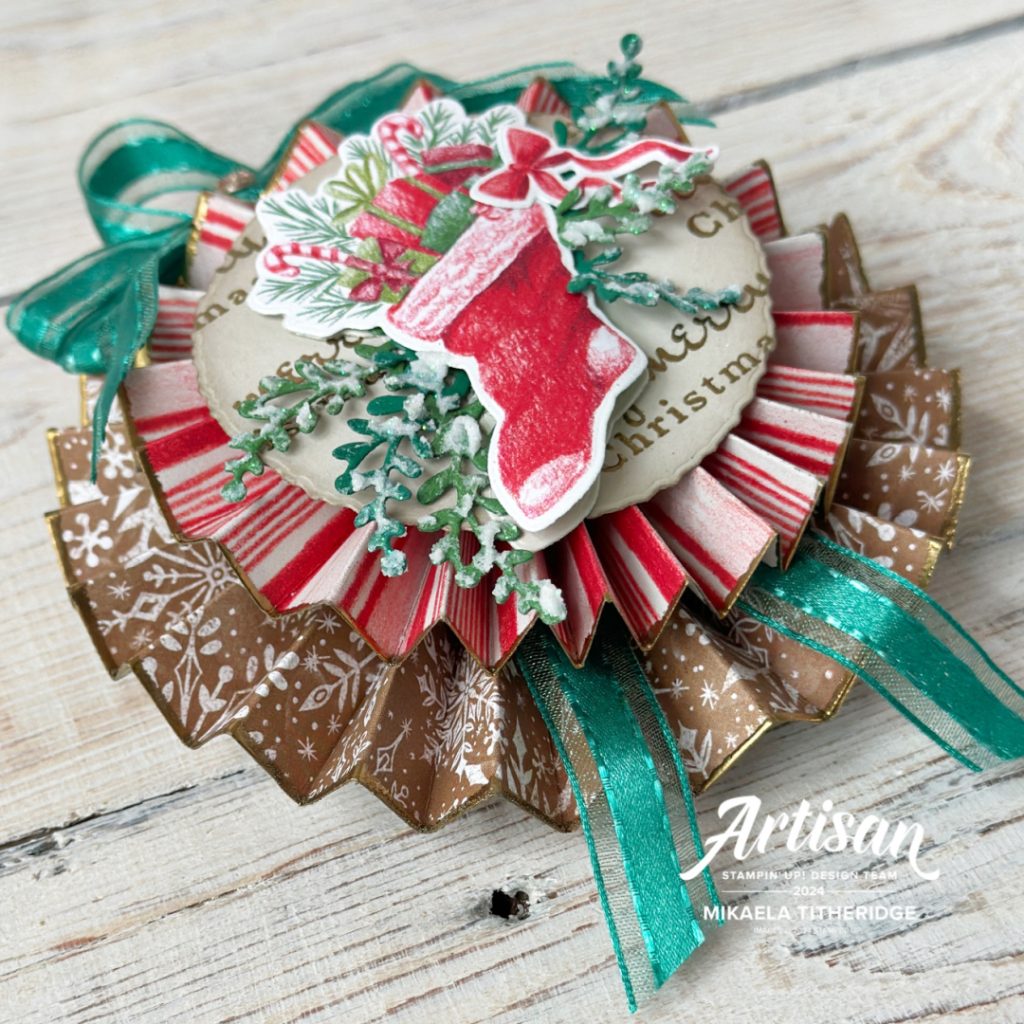
Sentimental Christmas wishes rosette hanging ornament by The Crafty oINK Pen

Pressing the edges into Versamark Ink before Heat Embossing with Gold Heat Embossing powder gave extra detail. This would tie in beautifully with my embellishments and heat embossed background sentiment of the focal point.

To help keep that vintage feel, I used Basic Biege, cut with a Deckled Circle die, heat embossed and blended with some Early Espresso ink. Upon this sentiment panel, I added die cut leaves, tapped with Shimmery Embossing Paste and added some die cut images from the Designer Series Paper.

Sentimental Christmas Rosette Ornament with Sentimental Wishes by The Crafty oiNK Pen

A bow and an embellishment gave that final touch of vintage glamour to this rather special piece.

Flat Paper Strip Bauble

My second christmas ornament was created using strips of Designer Series Paper. Cutting differing lengths and working to the smallest, helps create this fabulous elegant bauble shape.

Here I used a 13cm/5″, 13.5cm/5 1/4″, 14.5cm/5 3/4″ and 16cm/6 1/4″ strips.

Stapling the ends together at both ends, helps securly hold everything together and begins to form this bauble shape.
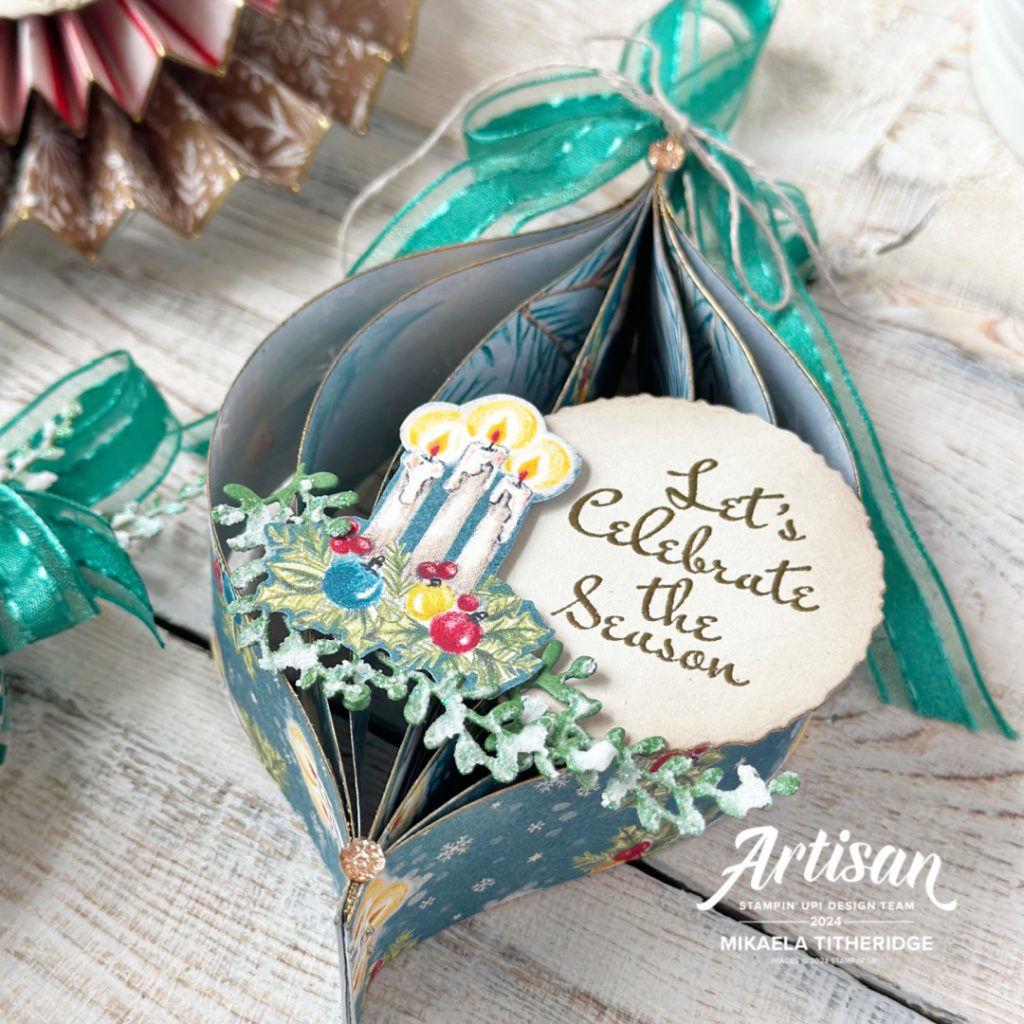
Sentimental Wishes and Sentimental Christmas hanging ornament by The Crafty oINK Pen

Once held together, I pressed the forward edge into Versamark Ink and heat embossed with Gold Embossing Powder. Cutting a circle of Basic Beige cardstock with a Deckled Circle die, I blended Early Espresso Ink around the edges. The sentiment came from the Sentimental Wishes Stamp Set and the candles were fussy cut from the Designer Series Paper. The foliage was die cut from Garden Green cardstock and had some Shimmery White Embossing Paste tapped onto the surface.
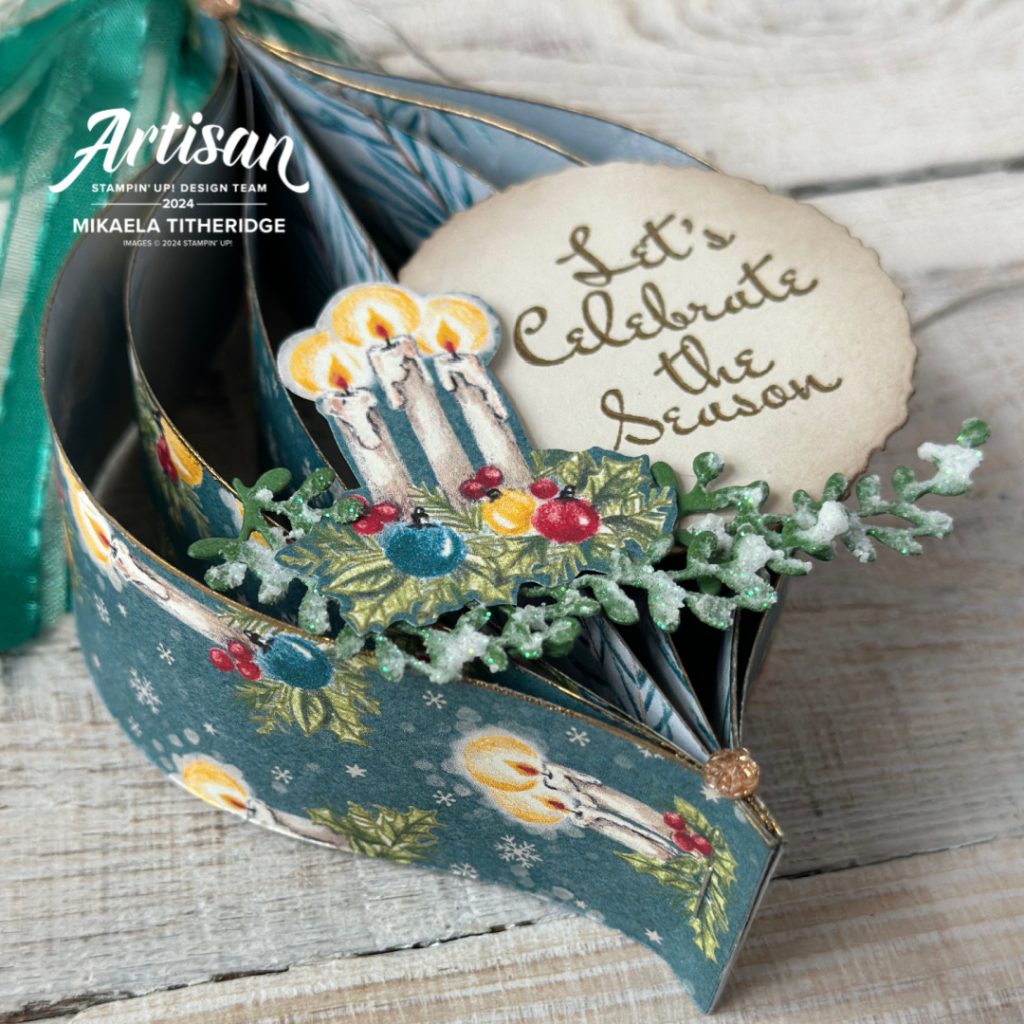
Sentimental Christmas Ornament by The Crafty oINK Pen

A final looop of ribbon, a bow and some perfectly placed Embellishments helped add the finishing touches to this ornament.

Honeycomb Bauble

This honeycomb bauble is so effetive and reminds me of many a paper decoration from my childhood. I used a 2 3/8″ Circle Punch to punch out 12 circles that I proceeded to fold in half. With a template, I measured the circle and divided it into thirds before making a marker. This helped me when alternating where to put a line of glue.

On the inside fold of one, I added a central line of glue from the edge to the middle. On the outside edge, I added two lines at my top and bottom markers. This was repeated until all layers were adhered and I was ready to close up my bauble. Adding Hot Glue to the middle, helped hold my ribbon in place before closing up my bauble with the final layer of glue lines.
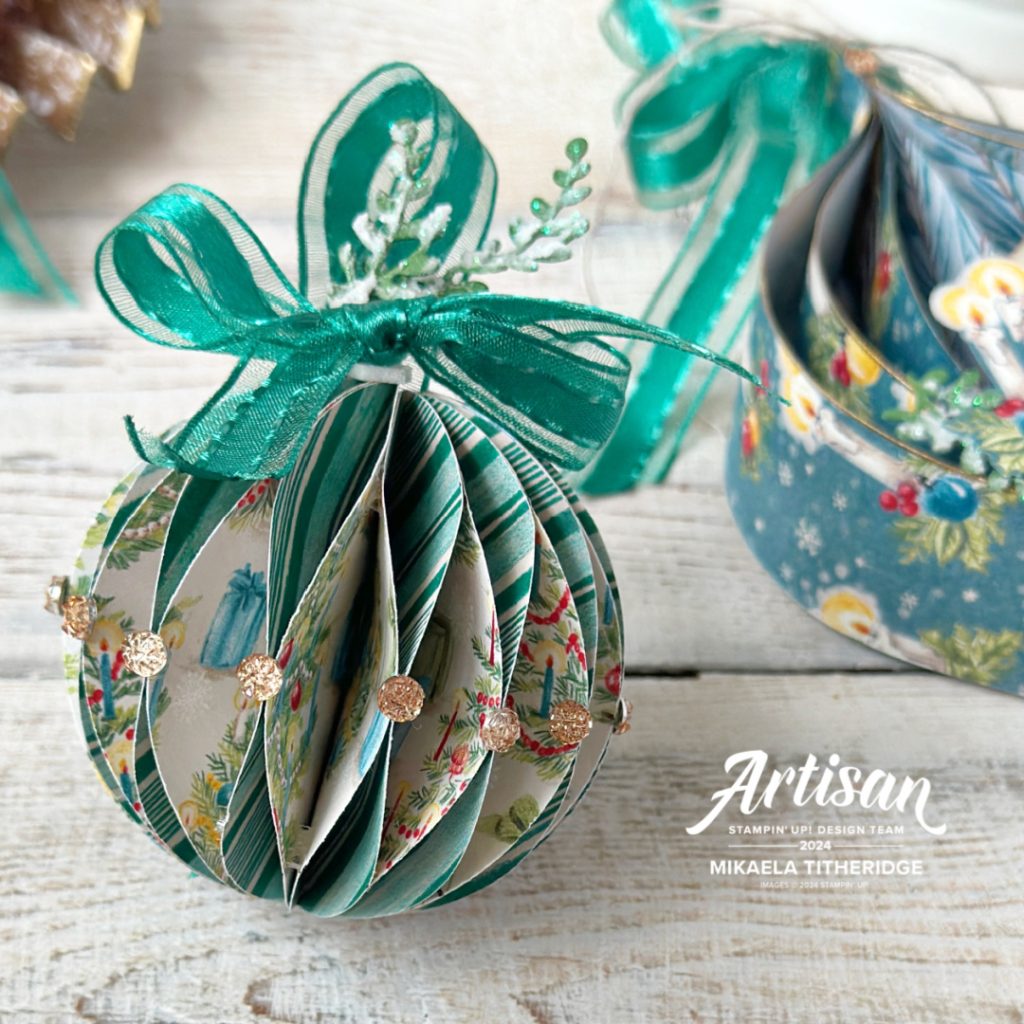
Sentimental Christmas wishes hanging honeycomb ornament by The Crafty oiNK Pen

This method is a fabulous way of showcasing both sides of the paper. To add that final little something, I added Embellishments to the outside edge at the point the central glue line ended.
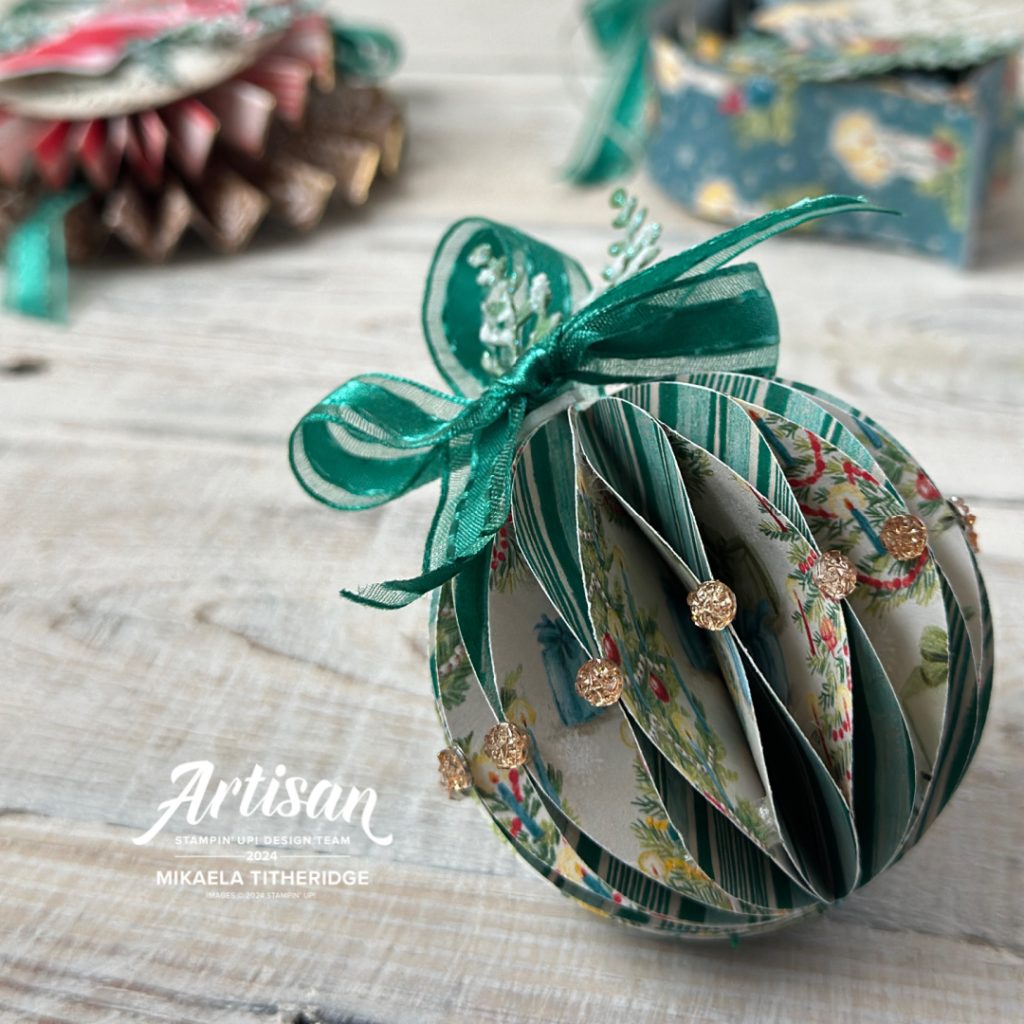
Sentimental Christmas Hanging Honeycomb Ornament by The Crafty oINK Pen

To complete the embellishments on my bauble, I added a bow and some die cut leaves, tapped with Embossing Paste.

I hope I have managed to give you some fun ideas on how you could use your Designer Series Paper. This paper certainly has that wonderful nostalgic feel about it.

Thank you for stopping by today. Be sure to add the Sentimental Christmas Designer Series Paper to your basket today and help share the love.

Mikaela Titheridge, UK Stampin' Up! Demonstrator, The Crafty oINK Pen. Stampin' Up! Products available through my online shop 24/7


Products used for this project

Get More for your Money …

  • Shop Online with me this month for a Thank you Gift when using Shopping Code: PQ6CNGB3
  • Purchase a Starter Kit for £99 : Choose £130 worth of products postage FREE.  Read HERE 

A Free Download of the All Star Tutorial Bundle comes with both of the above options.

Join my Team, Mikaela Titheridge, The Crafty oINK Pen, UK Stampin' Up! Demonstrator


Filed Under: Artisan Tagged With: Artisan Design Team, Artisan Design Team 2024

Subscribe to my Newsletter

Privacy Policy
Artisan Design Team – Secret Santa Exchange
Artisan Design Team – Hearts of Elegance

Leave a Reply Cancel reply

Your email address will not be published. Required fields are marked *

WELCOME TO
The Crafty oINK Pen
Hi, I am Mikaela and I live with my wonderfully supportive husband and our gorgeous little boy. I'm a full time Mum and Stampin' Up! Demonstrator and love everything crafty.
  • E-mail
  • Facebook
  • Instagram
  • Pinterest
Stampin' Up! Artisan Design Team 2024
Stampin' Up! Artisan Design Team 2023
Order Stampin' Up! products online

click to view

click to view

Subscribe to Blog via Email

Enter your email address to subscribe to this blog and receive notifications of new posts by email.

Join 4,612 other subscribers.

Instagram

thecraftyoinkpen

🎨Sharing my love for #papercrafting through Classes, Tutorials and Events with @stampinupofficial products. ✨Artisan Design Team 2019, 2023 & 2024

This quarter's Piccadilli Players hop is all about This quarter's Piccadilli Players hop is all about Seasons from around the globe. 

For me I share the beautiful rich colours of Autumn through the wonders of @stampinupofficial Radiant Sunflowers and rich Cajun Craze. Bright popping sunflowers, warm rich colour palette, autumn is a season of great change and one I love. 

Next up in the hop is the fabulous Bree @craftsomnia who I know will have something quite amazing to share. Be sure to show her some love before heading over to the rest of the team and those taking part today. Enjoy!

Full list of today's Piccadilli Players participating:
Mikaela - @thecraftyoinkpen <you are here>
Bree - @craftsomnia 
Maheswari -@maheswarirajaguru
Elizabeth - @seeinginkspots 
Verena - @simple_stamper 
Monique - @stampin_met_monique 
Yvonne - @thecreativeteacup 

Explore more and find a full supply list on my website today: www.thecraftyoinkpen.co.uk

SHOP FOR CRAFT SUPPLIES > Link in Bio / thecraftyoinkpen.stampinup.net

GET MORE FOR YOUR MONEY: Join my Team by purchasing your Starter Kit
Link in Bio / thecraftyoinkpen.stampinup.net
…………………………………………………

#StampinUp #artisanalumni #TheCraftyoINKPen #papercrafts #cardmaking
Today I share a Monochomatic contemporary card tha Today I share a Monochomatic contemporary card that's Black and White and designed for the Stamping Fancy Friday Challenge this month. 

Created using the Spooktacular Designer Series Paper, Extraordinary Life and Fern & Flora Dies from @stampinupofficial  Layering up elements for a contemporary collage, helped create this Anniversary Card. 

Explore more and find a full supply list on my website today:  www.thecraftyoinkpen.co.uk

SHOP FOR CRAFT SUPPLIES > Link in Bio / thecraftyoinkpen.stampinup.net

GET MORE FOR YOUR MONEY: Join my Team by purchasing your Starter Kit 
Link in Bio / thecraftyoinkpen.stampinup.net
…………………………………………………

#StampinUp #artisanalumni #TheCraftyoINKPen #papercrafts #cardmaking
I share a Timemless Design that's Elegant and Vint I share a Timemless Design that's Elegant and Vintage as part of today's Stamping Station Hop. 

Designed using the beautifully vintage Bloom Bouquet Designer Series Paper from @stampinupofficial along with their Bordered in Beauty Dies. A delicate little card with flowers created from the Fern & Flora Dies in Hydrangea Hue. 

Check out the beautiful work created by others in the hop today:

Mikaela @thecraftyoinkpen 
Marga @marga_bultena 
Yvonne @thecreativeteacup 
Tami @tamilhewlett 
Tammy@stampspaperscissors 
Dani @danisthoughtfulcorner 
Cheryll @senseofwhimsy 

Explore more and find a full supply list on my website today:  www.thecraftyoinkpen.co.uk

SHOP FOR CRAFT SUPPLIES > Link in Bio / thecraftyoinkpen.stampinup.net

GET MORE FOR YOUR MONEY: Join my Team by purchasing your Starter Kit 
Link in Bio / thecraftyoinkpen.stampinup.net
…………………………………………………

#StampinUp #artisanalumni #TheCraftyoINKPen #papercrafts #cardmaking
I may have been quieter than normal with my crafti I may have been quieter than normal with my crafting but I recently designed a series of cards for Die Cutting Essentials Magazine using the Fern & Flora Bundle by Stampin' Up!

I adore the botanical feel of these dies and what you can create with them. This wreath card screams whispy fresh air combined with richness, I just loved creating it. Would you welcome a botanical card like this for your birthday?

Explore more and find a full supply list on my website today:  www.thecraftyoinkpen.co.uk

SHOP FOR CRAFT SUPPLIES > Link in Bio / thecraftyoinkpen.stampinup.net

GET MORE FOR YOUR MONEY: Join my Team by purchasing your Starter Kit.
Link in Bio / thecraftyoinkpen.stampinup.net
…………………………………………………

#StampinUp #artisanalumni #TheCraftyoINKPen #papercrafts #cardmaking
This week's Global Design Project #GDP563 is a Gar This week's Global Design Project #GDP563 is a Garden Harvest Challenge. 

Pairing up two new bundles from @stampinupofficial Radiant Sunflowers and Painted Pumpkins for this autumn themed card. Rich autumn colours and autumn themed images for a card of gratitude. 

Play along with this week's challenge. Grab your craft supplies and get creative!

🌎Create a project
🌎Post your creation to Instagram or Facebook
🌎Mention @global_design_project 
🌎Use the challenge hashtag #GDP563

Explore more and find a full supply list on my website today:  www.thecraftyoinkpen.co.uk

SHOP FOR CRAFT SUPPLIES > Link in Bio / thecraftyoinkpen.stampinup.net

FREE TUTORIALS: Spend £25 or more in my online shop and gain exclusive access to that month’s All Star Tutorial. For orders over £90, consider the Starter Kit for greater value. 

GET MORE FOR YOUR MONEY: Join my Team by purchasing your Starter Kit for £99 and choosing a whole lot more.
Link in Bio / thecraftyoinkpen.stampinup.net
…………………………………………………

#StampinUp #artisanalumni #TheCraftyoINKPen #cardmaking
This week's Global Design Project #GDP562 is a Ske This week's Global Design Project #GDP562 is a Sketch Challenge. 

From this sketch layout I could see a layering hillside that I recreated using torn Moonlight Flora Designer Series Paper from @stampinupofficial With this I teamed it up with a wholesome house from the Welcome Noel Die Set that I coloured with Stampin' Blends. 

Play along with this week's challenge. Grab your craft supplies and get creative!

🌎Create a project
🌎Post your creation to Instagram or Facebook
🌎Mention @global_design_project 
🌎Use the challenge hashtag #GDP562

Explore more and find a full supply list on my website today:  www.thecraftyoinkpen.co.uk

SHOP FOR CRAFT SUPPLIES > Link in Bio / thecraftyoinkpen.stampinup.net
Follow on Instagram

Important Links

  • Home
  • Blog
  • Shop
  • Events
  • Buy the Starter Kit
  • Contact Me
  • Privacy Policy

All content of this blog is the property of Mikaela Titheridge, UK Independent Stampin' Up!® Demonstrator, and is not endorsed by Stampin' Up!®

The projects, photos, ideas and articles are shared for your personal use, so I would ask that you please use my creations as inspiration only. Images may not be reproduced for website, competition, magazine or book submissions, removed, duplicated or copied without my express permission.

Thank you

Stampin' Up! Artisan Design Team 2023
  • E-mail
  • Facebook
  • Instagram
  • Pinterest

Subscribe to Blog via Email

Enter your email address to subscribe to this blog and receive notifications of new posts by email.

Join 4,612 other subscribers.

Copyright © 2026 · Hello Sweets by Hello You Designs · Customised by Catherine Carroll

We use cookies to ensure that we give you the best experience on our website. If you continue to use this site we will assume that you are happy with it.